Sharing and Assessment
Sharing with Others
Table of contents
1. Introduction to sharing on QMplus Hub [edit]
2. Where to find the sharing options for a page [edit]
3. Setting up who to share with [edit]
Introduction to sharing on QMplus Hub [edit]
By default, everything you do in QMplus Hub is private. No one can see the content that you create there until you decide you want to share it. Although it might be useful to keep things to yourself, there's probably going to be a point where you want to, or have to, share things with others. The way you share things in QMplus Hub is through pages. You can create a page, add your content to it, and then share that page with whoever you like. Options for sharing include:
- Individual QMplus Hub users
- All users on QMplus Hub
- Members of QMplus Hub groups you belong to
- Your QMplus Hub group friends
- The public
Where to find the sharing options for a page [edit]
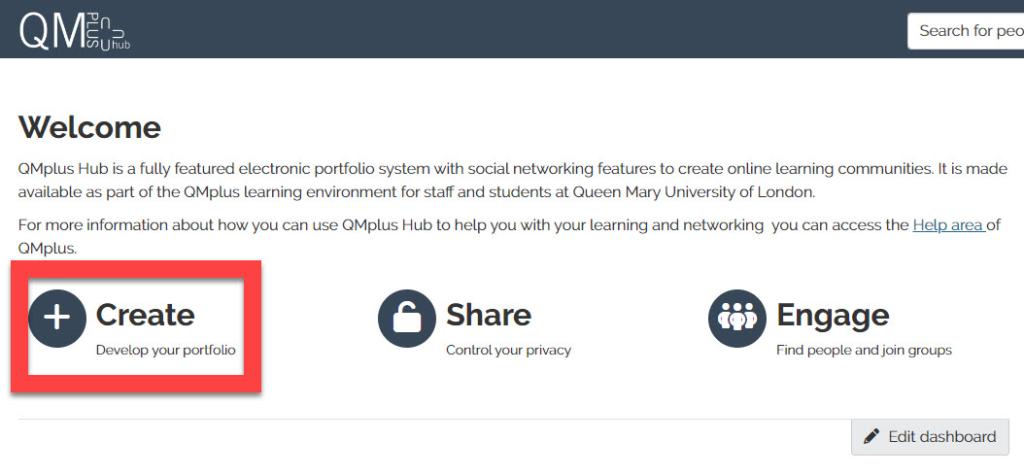
From your QMplus Hub dashboard, click on the Create option.

On your portfolios page, you'll notice that there is a little padlock icon on the bottom left of each panel on the page. This indicates whether your page or collection is shared or private.
- An open padlock indicates a page that is shared
- A closed padlock indicates a page that is private
Once you're on a page you can access sharing options by clicking the three dots on the right-hand side, and selecting Manage access.
Setting up who to share with [edit]
The first thing to decide is who you want to share your page with. In the sharing options page, find the Shared with section.
You have a number of options:
- Search for - You can use the search feature to find a particular individual or a group to share with.
- General - Here you can choose some general classes of user to share with.
- Public - this will make your page completely open to anyone on the internet.
- Registered users - this will make your page visible to anyone who has a QMplus Hub login.
- Friends - this will make your page available to anyone you have made friends with.
- Groups - If you are a member of any groups on QMplus Hub, you will see them listed here and you can share your page with the members of that group. If you are a member of lots of groups, this list might be quite long and it may be easier to use the Search for item to find a particular group.
Once you have selected who you want to share with you can:
- Give the person a specific role which you can select from the drop down list.
- Add a start and end date for the sharing.
- Remove this user/group by clicking on the bin icon.
How to configure advanced sharing options [edit]
- Allow comments - By default, anyone you allow to access your page will be able to leave a comment on it. Comments appear at the bottom of your page. You can change this through the advanced sharing options. If you don't want people to be able to leave comments, click to turn the setting off.
- Moderate comments - If you want to allow comments but want to moderate them first, turn the moderation setting on.
- Allow copying - You can allow those with access to your page to be able to make a copy of it. This might be useful if you are setting up a template page that you'd like to share with others but otherwise, it's unlikely you'd want to turn this on.
- Overriding start/stop dates - While you can set up access times on each of your access rules, this setting overrides all of those.
Submitting to QMplus for assessment [edit]
Students can submit their portfolios to QMplus for grading and feedback.
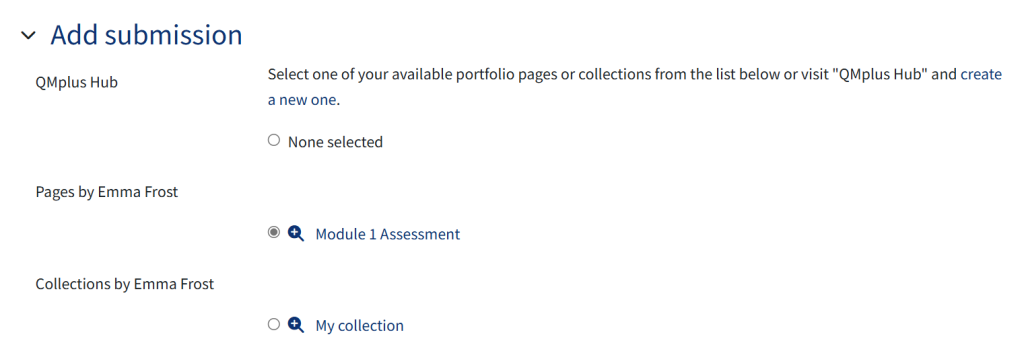
To enable students to submit their portfolios, create a new assignment activity in QMplus, go to the 'submission types' setting and select QMplus Hub ePortfolio.

When the student goes to the submission page, they will have the option to select content created in QMplus Hub to submit to the assignment.

Please note: Turnitin reports cannot be generated for QMplus Hub portfolio submissions.
Return to all QMplus Hub guides