Linking EchoVideo (Q-Review) LectureRecordings to QMplus
Q-Review and QMplus
Table of contents
1. Add the EchoVideo (Q-Review) Activity [edit]
2. Mapping Recordings to a Course [edit]
3. Adding Multiple Recording Sets [edit]
3.1. Useful Resources
Linking EchoVideo (Q-Review) LectureRecordings to QMplus
Before adding EchoVideo (Q-Review) recordings to QMplus, ensure that your lectures have been scheduled for recording and that the recordings are linked to the correct QMplus course area.
Add the EchoVideo (Q-Review) Activity [edit]
- Navigate to your QMplus course and turn Edit mode on.
- In the section where you would like the recordings to appear, select Add an activity or resource.
- From the list of activities, select Q-Review Recordings.
- No additional settings are normally required.
- Click Save and return to course.
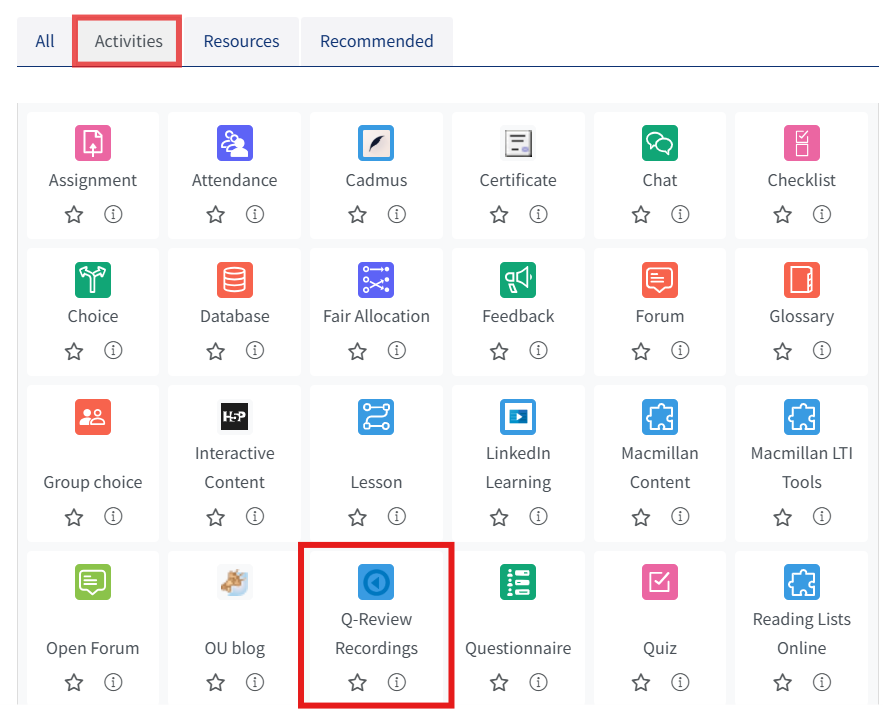
A link to EchoVideo (Q-Review) will now be added to the course page.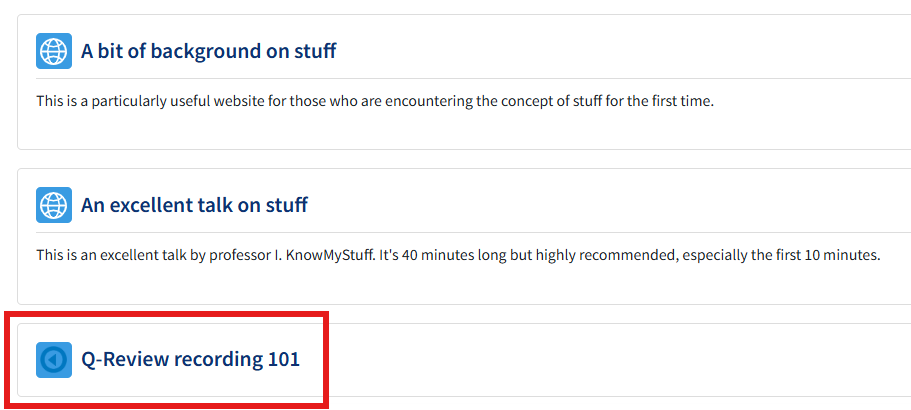
Mapping Recordings to a Course [edit]
For most modules, the EchoVideo (Q-Review) link is mapped automatically by departmental administrators.
If you need to map the recordings yourself:
- Open the newly created Q-Review Recordings link.
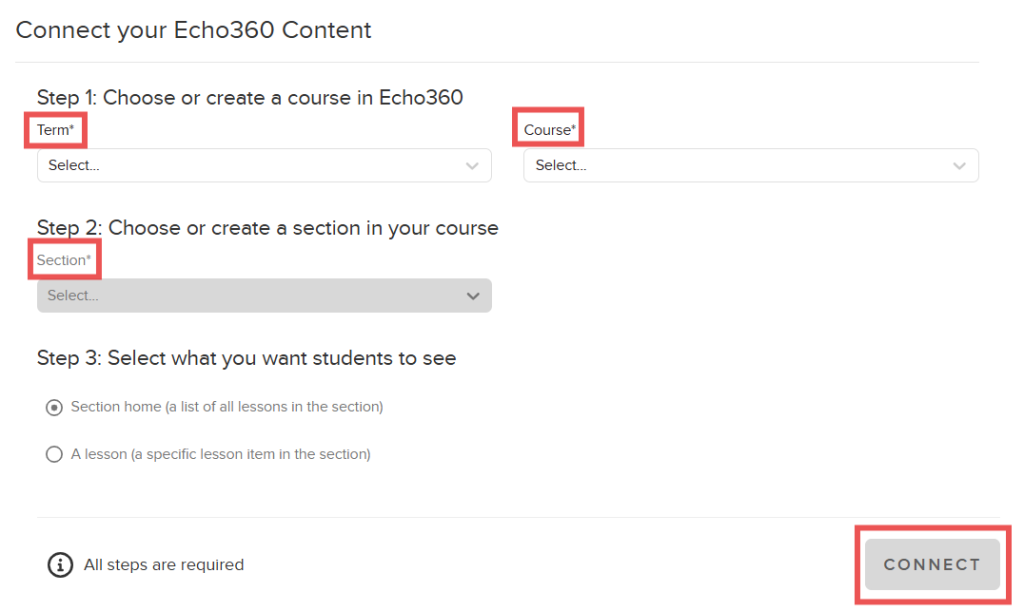
- Select the appropriate Term, Course, and Section from the drop-down menus.
- Choose whether students should see:
- A list of all recordings in the section, or
- A specific recording.
- Click Connect.
Adding Multiple Recording Sets [edit]
If you need to display recordings from more than one EchoVideo (Q-Review) section in a QMplus course, repeat the steps above to add additional Q-Review Recordings activities.
Where multiple recording links are used, give each one a clear name so that students can easily identify them, for example:
- EchoVideo (Q-Review) Recordings – ESH101
- EchoVideo (Q-Review) Recordings – ESH102
This helps distinguish between recordings from different modules or teaching groups.
