Q-Review and QMplus
You will need to ensure that your lectures have been scheduled to be recorded, and that they are connected to your QMplus course area.
Adding your recordings to QMplus
Once your lectures are being recorded, to add the recordings to QMplus:
- Navigate to the course area and turn editing on by clicking the pencil icon in the top right
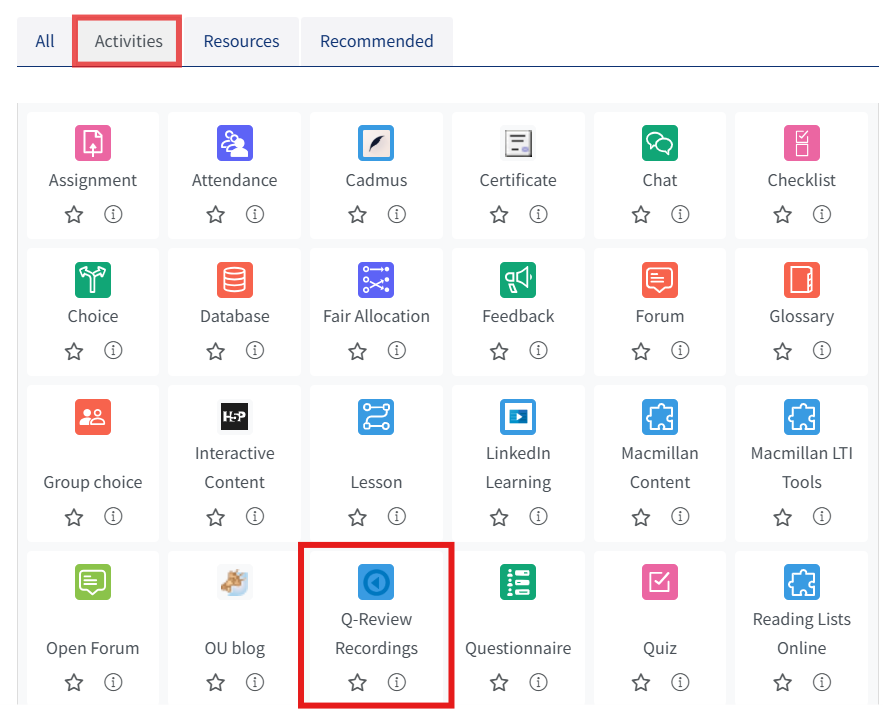
- Click on the ‘Add an Activity or Resource’ link within your topic of choice
- From the activity picker select the 'Activities' tab
- Then select ‘Q-Review Recordings’


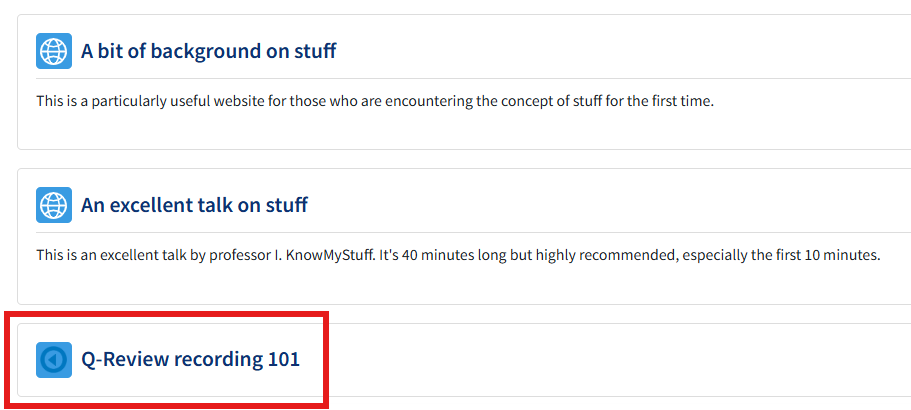
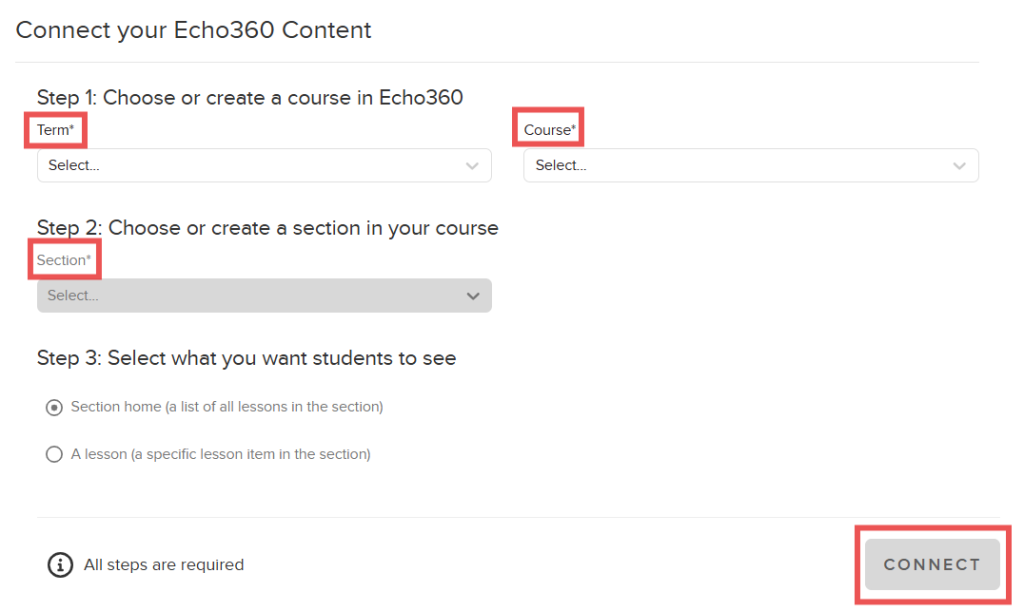
Most courses’ Q-Review links will be set-up by the departmental administrators, but if you have the need to map the recordings, please click on the newly created link (image above). You will then see options for the Term, Course and Section as drop-down menus. You will also need to choose what you want students to see, whether you want to link to a list of lessons or a specific lesson item in your section. Make your selections and then click the ‘Connect’ button: There may be some instances where you want two or more Q-Review sections to be displayed in a QMPlus course area. Should you need to do so, simply follow the previous steps again.
Once you have done so, you will see both Q-Review links mapped to your course page for each set of lessons you have chosen. Should you have multiple Q-Review links on your QMplus course area, please name them accordingly so they can be differentiated between (e.g. ‘Q-Review Lecture Recordings for ESH101’ & ‘Q-Review Lecture Recordings for ESH102’).