What a Block is
Blocks enable you to customise your course. They include organisational tools such as the calendar or communication tools such as the latest news or Quickmail blocks. Some blocks are visible to your students, some provide functionality that is only available to teachers or administrators.
Although blocks can be useful, there are a lot to choose from. Don’t be tempted to overload your course area with blocks which are visible to your students. Which ones will be most useful?
Blocks enable you to add a wide range of different functions to your course page. Some blocks are visible to your students, some provide functionality only available to teachers and administrators.
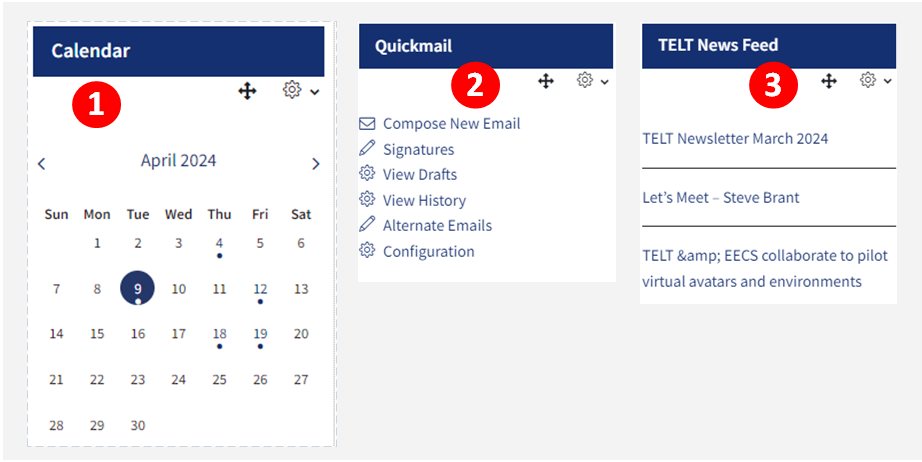
1. Calendar – the calendar block allows you to display QM events, course events, group events and the user’s personal events.
2. Quickmail – allows you to send emails to the students on your course. This block cannot be seen by students.
3. RSS Feed – the RSS feed block allows you to pull in content from external websites. In this case news stories from the TELT website are being displayed. This block is visible to students.
Adding a Block to your Course Page
1. Switch Edit Mode on, using the button in the top right corner
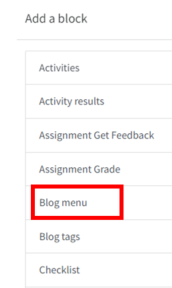
2. Click Add a Block in the top right hand side

3. Select one of the available blocks. In this example I have selected Remote RSS Feeds.
Some blocks, such as the ‘RSS Feeds’, require some configuration. Others, such as the ‘QuickMail’ block are activated as soon as they are added.
Some blocks, such as the ‘RSS Feeds’, require some configuration. Others, such as the ‘QuickMail’ block are activated as soon as they are added.
Repositioning and Editing your Blocks
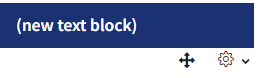
In editing mode, small icons appear below the block’s heading. The cross arrow allows you to reposition the block by dragging and dropping it. The cog icon provides access to a menu which allows you to configure, delete, show or hide your block.
Some blocks can only be added to a course area once and will disappear from the add a block menu after they have been added. Other blocks can be added more than once.
The Module Info Block
The Module Info block should appear at the top right of a QMplus area. It contains core information for students about the module, who is teaching it and how they can be contacted, where the module is taught and other useful information. Some of the information is automatically populated from the student record system.
Even if your area is not linked to a module on the student record system, the module info block is still a good place to provide core information about the area, for instance contact details. It is very customisable.
The module info block is part of our QMplus baseline standards and therefore should be included in all taught modules. You can read more about this in our baseline standards pages
Most module areas in QMplus will already have a module info block. This may have come from a departmental template or it may have been added by a previous module organiser. If you cannot see a module info block in your module area, you will need to add one.
For more information about how to add and customise the Module Info Block, please access the guide below.
Displaying Important Information with the Module Info Block
Recommended Blocks
There are a lot of blocks to choose from but the following are some blocks that are likely to be most useful:
- Course Mappings Block - this block allows you to see which students have been enrolled onto your course. Please click here to learn more about adding and using this block.
- Sharing cart – Allows you to copy content from one QMplus area to another.
- Mass actions – Allows you to perform actions on several items in your QMplus area at once, such as moving, hiding or deleting items
- Completion progress – Allows you to provide a way to help students keep track of their progress through your module and allows you to see their progress too.
- Quickmail – the Quickmail block allows you to send emails to your students. This keeps emails out of your standard inbox.
Adding a Calendar
Calendars in QMplus are very flexible and can display important information to users all in one location. This is done through the use of colour, different colours denote whether the event is relevant to the whole department, related to a specific course or if it has been created by the individual user.
Adding a Calendar block
Adding external content with an RSS Feed
RSS feeds allow us to pull external content into QMplus module areas. This allows your students to see real-time updated, relevant content and can make your module area more dynamic. RSS stands for “Really Simple Syndication” and is a mechanism whereby you can subscribe to be told about new information on your favourite blogs or websites.
For details on how to add this to your QMplus page and what the results may look like, see the RSS Feeds in QMplus page
Sticky Blocks (Admin Only)
A sticky block can be added to a specific category making it appear in every page within the category. The settings allow you to manage the block depending on how you would like it to be displayed. When you edit a sticky block the changes appear across all the pages in the category (if the block has been configured to show on every page). When the block is edited or deleted at a course level, it is also edited or deleted across the whole category. The block can be added to a particular sub category or department.
To learn how to add and delete Sticky Blocks, please see the guide below
Adding a Sticky Block (Admin Only)
Useful Resources
- Displaying Important Information with the Module Info Block
- Adding a Calendar Block
- Adding a Sticky Block