Making the QMplus Media course media gallery visible to students
Check the media gallery settings
Before you make the course media gallery visible, there are some decisions you should make and settings you should check.
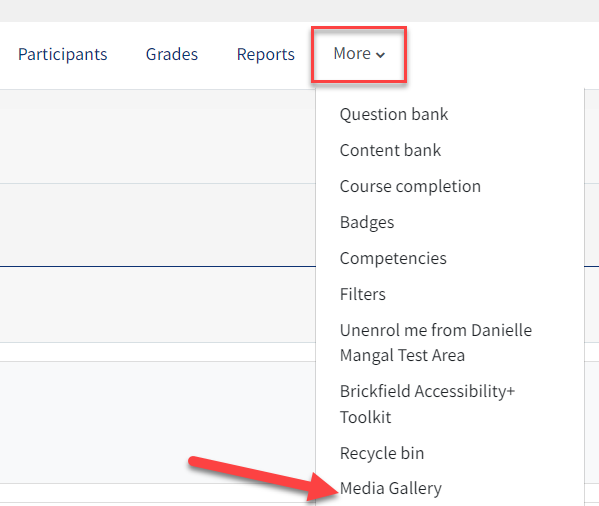
Click the More drop down menu from the tabs at the top of your course page and click Media Gallery.
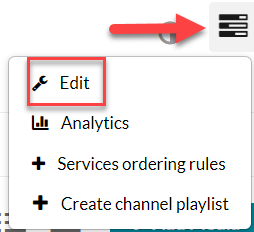
Click on the Channel Actions icon and then select Edit
In the options section of this page, there are a number of settings you should consider.

- Moderate content – we recommend that you check this item. This means that students cannot publish videos to the media gallery without a moderator allowing it. Unfortunately there is no way to turn off student publishing completely. Keeping this option checked will effectively prevent students videos appearing in the gallery.
- Enable comments in Media Gallery – if you check this item, students will be able to leave comments on videos in the gallery. If you don’t want this, uncheck the box
- Keep comments private to media gallery – related to the previous setting, if you have allowed comments, you can decide whether these comments are only seen by those with access to this media gallery. If unchecked, comments may be visible in other places where you have published this video…e.g. if you have used it in more that one module
- Display embedded media in this media gallery – if you enable this option, any videos you embed into this QMplus area using the the QMplus Media icon in the editor, will automatically be published in this media gallery.
Once you have made your selections, click on the Save button.
Change the permissions on the media gallery
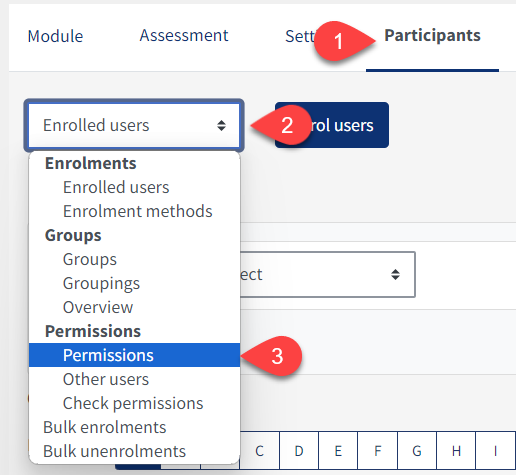
Navigate back to the home page of the module and select the Participants tab at the top. Click on the drop down menu which will display 'Enrolled users' then click on Permissions.
- Type “media” into the filter text box and the course media gallery settings should appear
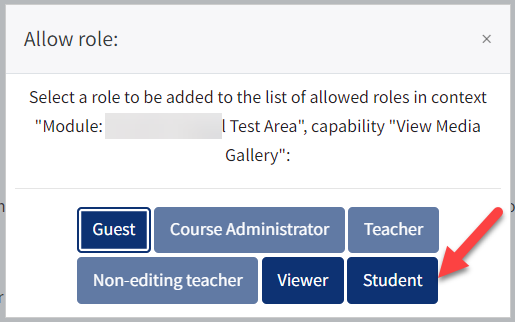
- Click on the allow button in the ‘Roles with permission’ column, it appears as a plus icon +

Click on Student.
The new permission is automatically saved after you click the Student option.
Students will now be able to see the link under settings.
.png)
Other ways to make videos viewable
If you only want students to be able to view videos, you do not have to do this through the course media gallery. You can make your videos viewable in a variety of different ways, depending on what you are trying to achieve: