Resources
Using the picker
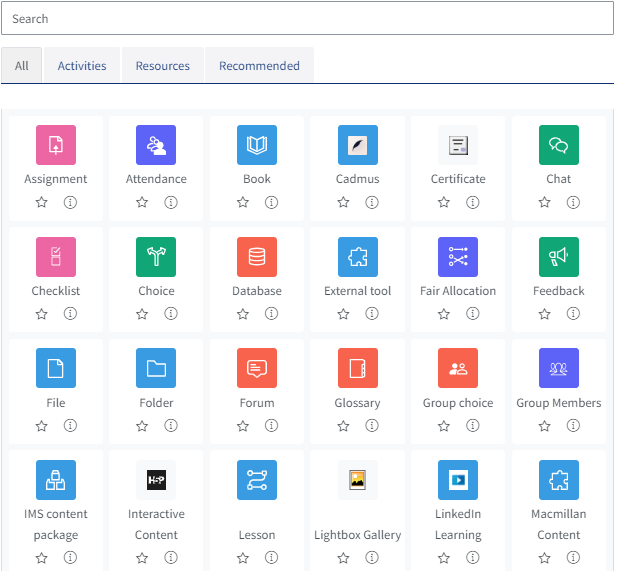
You can add Activities and Resources to your course via the activity picker.
To access the picker:
- Open your QMplus course and turn edit mode on via the slider in the top right corner.
- Scroll to the section you want the activity or resource to sit in
- Click Add activity or resource
- This will open the activity picker you can choose from.
For details on how to add this resource and what it may look like - Text and media area guide.
For even more information on using this resource such as adding video & code - Using the Text and media area
Uploading Files
Files are not just materials such as word-processed documents or slideshow presentations. All types of files can be uploaded and accessed through Moodle, but the student needs to have the correct software to be able to open them.
Files may be added in two ways: They can be dragged and dropped directly onto the course page, or added by clicking File from the activity chooser. Once uploaded, different file types are shown with different icons.
For more information visit Uploading a file
Prefer to watch a video?
Creating a Page
A page resource creates a link to a screen that displays the content created by the teacher. The Text editor allows the page to display many different kinds of content such as plain text, images, audio, video, embedded code or a combination of all these. Pages are more accessible than uploading word-processed documents, particularly if the document just contains text to be read and not downloaded.
For more details on the page resource please see - Page resourceAdding a text and media area
(Formerly known as a Label) a Text and media area serves as a spacer on a course page. It can be used to add text, images, multimedia or code in between other resources in the different sections.
It is a very versatile resource and can help to improve the appearance of a course if used thoughtfully.
Tidying up your page and naming your files
It is very easy for course areas on QMplus to end up consisting of long lists of files. This makes it difficult for students to find what they are looking for and means a lot of scrolling through course pages. This guide provides some hints on how to tidy up your file lists to make life easier for your students.
Please see
Tidying up your course page
It is also possible to hide content in a course area, please seeHow to hide content
Displaying the Course Media Gallery to students
Every QMplus area has a course media gallery. You can use this to publish videos which have been uploaded to QMplus Media (Kaltura). It can act as a central media hub for your QMplus area. It also provides useful functionality such as being able to see the analytics for video usage in your QMplus area. You can also create playlists of your videos which you can use in a variety of different ways.
Please refer to 'Uploading a video to your media area'.
By default, the course media gallery is not visible to students. It doesn’t have to be made visible to students to be useful. However, there may be times when you do want students to be able to access it. In particular:
- If you’d like students to be able to download videos for watching offline
- If you’d like students to be able to publish their own videos to the gallery to share with others
Adding links (URLs)
A URL (Uniform or Universal Resource Locator) is a link on the internet to a website or online file. Teachers can use the URL resource to provide their students with web links for research, saving the student time and effort in manually typing out the address.
Step by step
1. Turn editing on by navigating to your course and click on the 'Edit mode' slider, on the top right of the page, to enable editing.
2. In the section where you want to create your web page click on the Add
an activity or resource hyperlink.

3. Click on the 'URL' word to select this resource.
4. This will open a new page where you can give the URL a 'Name'.
5. Type or paste in the website address (URL) in the 'External URL' field.
6. You then have the option to add a 'Description'. You can then
make this visible on the module page by selecting the 'Display description
on module page' button.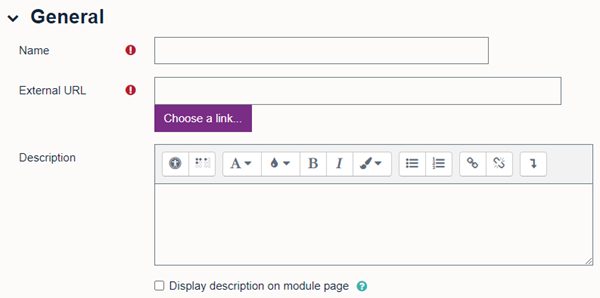
7. In Appearance, choose a display option. The options are:
- Automatic: Moodle chooses the best display option.
- Embed: The URL is displayed within the page below the navigation bar together with the URL description and any blocks.
- In frame: The URL is displayed within a frame below the navigation bar and description.
- New window: opens new browser window with usual menus and address bars.
- Open: Only the URL is displayed in the current browser window.
- In pop-up: The URL is displayed in a new browser window without menus or an address bar.
We recommend you select the 'Open' option as it is the best option when it comes to accessibility.
8. Click on the 'Save and return to module' or 'Save and display' buttons to view the page you have created.
Note that URLs can also be added to any other
resource or activity type through the text editor i.e. links can be added anywhere the following link
icon appears too.
![]()
Adding a Lightbox Gallery
The Lightbox gallery enables multiple images to be displayed as a photo gallery or album (as seen below).
When viewing a gallery you are presented with a series of thumbnails, click a thumbnail image to see it full size. Hover over the left or right edge of the enlarged image using the PREV and NEXT tabs to browse additional full size images.
For details please see Creating a Lightbox Gallery
.png)
Useful Resources
- Creating a page (Moodle doc)
- Text and media area guide (Moodle doc)
- Using the Text and media area (Moodle doc)
- Uploading a file( Wiki guide)
- Tidying up your course page (Wiki guide)
- How to hide content(Wiki guide)
- Uploading a video to your media area
- Making the QMplus Media course media gallery visible to students (Wiki guide)
- Adding links (URLs)(Moodle guide)
- Creating a Lightbox Gallery (Wiki guide)