Creating a Scheduler activity
Adding the Scheduler activity to your course
1. Open the course and turn Edit mode on, in the top right corner.
![]()
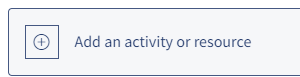
2. Select the topic where you want the Scheduler appear and click on Add an activity or resource
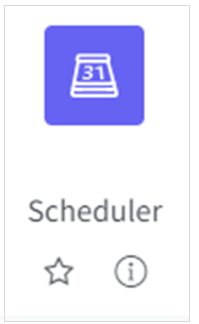
3. Select Scheduler from the list.
4. Enter a name and Introduction.
5. You will then need to make some selections to customise your course.
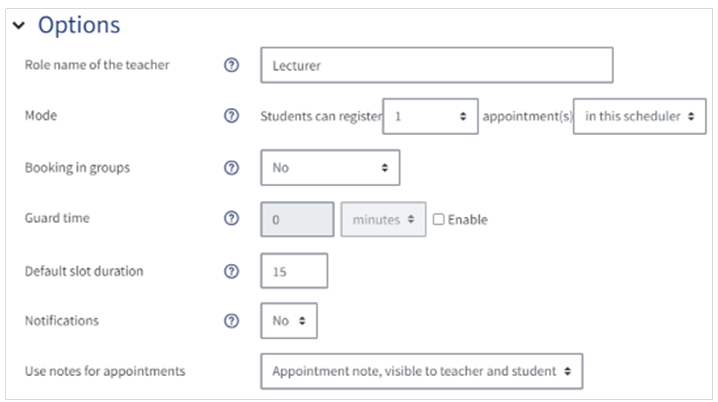
- Role name of the teacher: e.g 'Lecturer' the actual name of the person holding the meeting will also appear on the form, so we wouldn't advise using that.
- Mode: Choose whether your students can book more than one appointments at a time or in this scheduler.
- Booking in groups: This can be set to allow a student to book a slot for all members of their group to attend.
- Guard time: You can set a guard time if you wish, so e.g. you set a guard time of 2 hours this means that students cannot cancel their appointment within 2 hours of it starting, nor can they book an appointment that starts in less than 2 hours time.
- Default slot duration: The default length of time for the slot for all the appointments you set up.
- Notifications: If this is set to 'yes' both teachers and affected students will receive email notification for all slots created and cancelled.
- Use notes for appointments: Here you can set whether you want to be able to make appointment notes on QMplus and who they should be visible to.
If you have chosen to allow Booking in groups, you will need to enable Groups in the Common module settings section further down.
Once you have finished editing your settings click Save and return to course or Save and display.
Adding/Deleting slots in a Scheduler activity
1. Select the scheduler activity you have created to add slots.
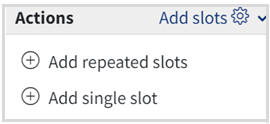
2. Choose whether you want to add a single slot or a repeated one (a series of slots)
3. You then need to edit the following settings.
- Date(s): One day can be selected, or should a date range be needed the 'Repeat slots until' date can be enabled.
- Add appointments on: Days of the week can be checked/unchecked as required.
- Time range: from/to times as displayed in 24 hour clock.
- Divide into slots?: dividing into slots allows creating as many slots that fit within the range. If not dividing, a single slot with the given duration will be created at start of the hour range.
- Duration: length of each appointment, listed in minutes.
- Break between slots: use this setting to add in any break time you would like between appointments
- Force when overlap: if enabled, this will overwrite any old appointments with the new ones.
- Maximum number of students per slot: enabled via the checkbox, then number of students can be entered to the left.
- Location: You can enter the location of the appointment(s) here.
- Person who is to be holding the appointments: course Admins/Teachers can be chosen from the drop-down list
- Display slot to student from: the appointment can be chosen to appear for the student from 1 day, to up to 6 weeks beforehand.
- Email a reminder: a reminder of the appointment can be sent to the attendees, and you can choose when you would like this to be sent, from 1 day, to up to 6 weeks beforehand:
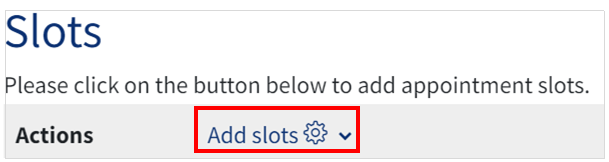
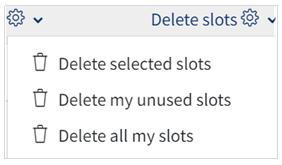
Once you have saved your slots, they will appear as shown below. To delete particular slots, select them and click Delete selected slots. You can also Add slots or Delete unused slots once all your students have booked an appointment. You also have the option to Delete all slots.

You can also assign slots for students, by scrolling down to where it tells you how many students still need to book a slot.
Click the cog next to Schedule and choose a slot for them
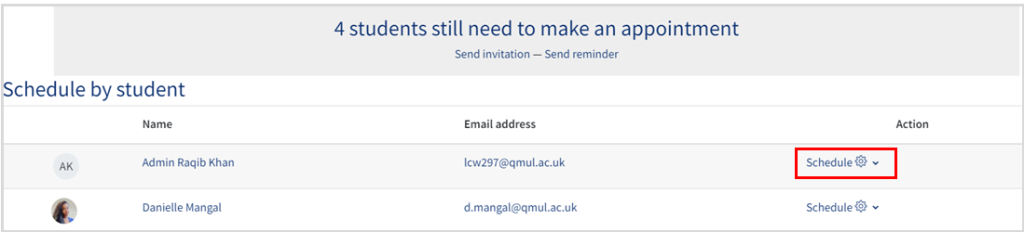
From here you can also mark that you have already seen them.
How to grade and add comments to students Scheduler appointments
When you have seen your student you can mark their attendance by ticking the box to the left of their name in the scheduler

You can then grade their work and add notes (if you have chosen these options in the settings.
To do this, click the students name and this will open a new screen where you can add a grade and notes.