Kalture Capture
Return to the main QMplus Media site
Introduction
The Kaltura Capture recording application allows you to make recordings on your desktop or laptop computer which can then be uploaded to the QMplus Media service. Kaltura Capture is available at no cost to both staff and students at QMUL and works on both Macs and PCs. You can use Kaltura Capture to record:
- Up to 3 input sources, any combination of audio, webcam and screen
- PowerPoint presentations, with audio and webcam. If you record a PowerPoint presentation, Kaltura Capture will automatically detect different slides and create a slide index so your viewers can easily navigate your presentation. (Note it is possible to record presentations with other presentation software but these do not have the automatic indexing functionality)
This means you can record a range of different types of video, from a “talking head” using a webcam and microphone to, a voice over PowerPoint, with or without webcam. As Kaltura Capture can record whatever is on your computer screen you can also record presentations with Keynote or Prezi or any other presentation software or “how-to” demonstrations for software tools. The options are endless.
Once you have made your recording, you can upload it to your My Media area. You can then use the online editor to make edits to your recording if required. Once you are happy, you can then publish the recording wherever you have publishing rights. For teachers, you can publish recordings in QMplus course areas. If you are a student, you may have been asked to submit your recording as a video assignment or to the Media Gallery for your module on QMplus. Recordings can also be published on pages in QMplus Hub.
What a recording looks like
The Kaltura Capture application allows you to record 1 or two video streams and audio. These streams are packaged up by the application and shown in a player where the person watching can control what they see.
Those watching the recording can customise the display by moving the different components around. If you have made a recording of a PowerPoint presentation, Kaltura Capture will also automatically provide a slide index accessed by the icon on the top left which allows those watching to jump to specific parts of the presentation.
The most common use is to have a “talking head” video…with a presentation (screen recording), web cam and audio. However depending what you have connected to your computer you can record combinations of cameras, screens and audio.
Launching Kaltura Capture
Log in to QMplus and click on the My Media link on your dashboard. Click on Add New and select Kaltura Capture from the menu. You will be asked to accept the terms and conditions and then you should see a prompt to start the application.
Selecting what you want to record
The first thing you need to do is to decide what to record. The options you see here, are called your sources, or inputs, and will depend on the devices that you have attached to your computer. Kaltura Capture allows you to record up to 2 video sources and an audio source. You do not have to have all 3 sources but you must have at least one to make a recording. If you do choose to have more than one video source, e.g. screen and webcam, these will be combined when you upload your recording to the QMplus Media server with:
- The source on the far left displayed in the main video window to begin with
- The source in the middle appearing picture-in-picture initially
Remember this is just how the video starts to play, people viewing the finished video can change how they view it through the player, swapping the displays as they want.
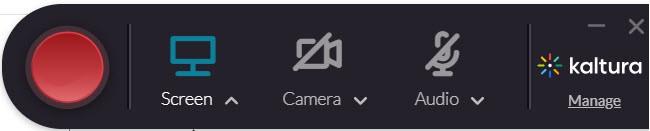
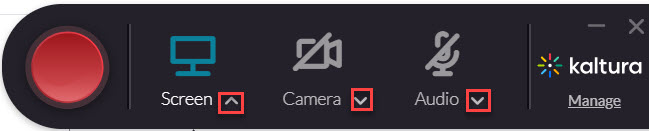
To select your sources, click on the arrows which show under each video/audio option:
What you see via these arrows will depend on which devices you have connected to your computer. In this example I have several devices attached to my computer including two screens. For each of the sources, I choose the device I want to record:
Make sure you’ve selected the right sources, especially for your audio. It’s generally best to use an external microphone to record, built-in microphones do not always make for good recordings. Experiment with your set up to see what works best.
If you want to turn off a source, such as one of the video elements or the audio, you can do this by clicking the icons, as shown below:
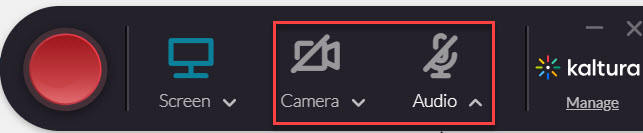
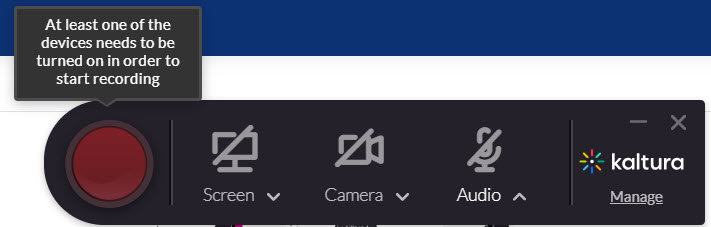
You must have at least one source to be able to record. If you disable all the sources, the record button will be unavailable:
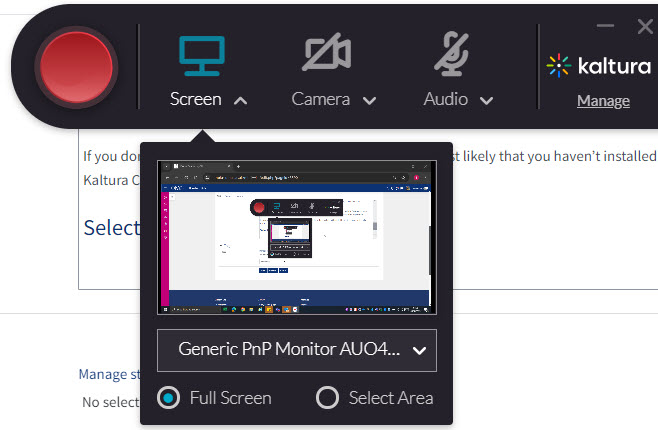
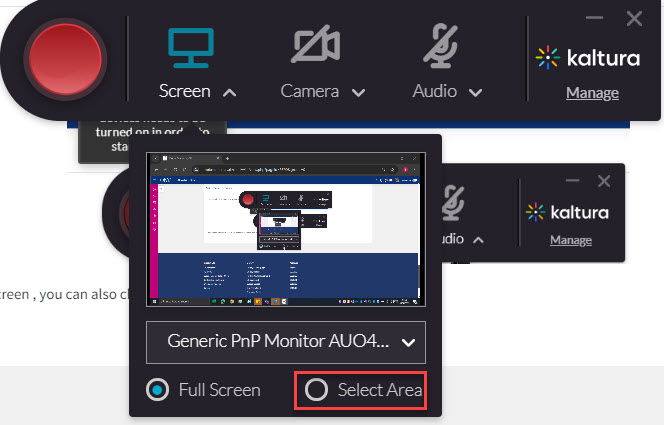
If you have chosen to record your screen , you can also choose to record the full screen or just a part of it:
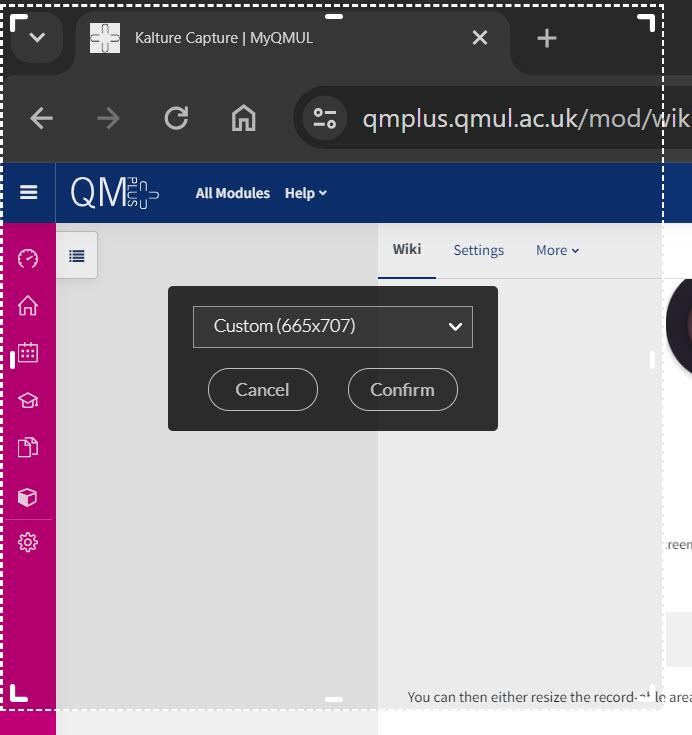
You can then either resize the record-able area by clicking on the corner and dragging to increase/decrease the area to be captured, or can select a size from the drop down menu:
Other settings
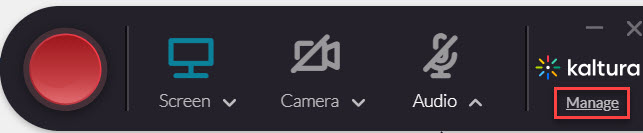
There are a couple of other settings you need to be aware of. These are accessed via the Manage link on the control panel.
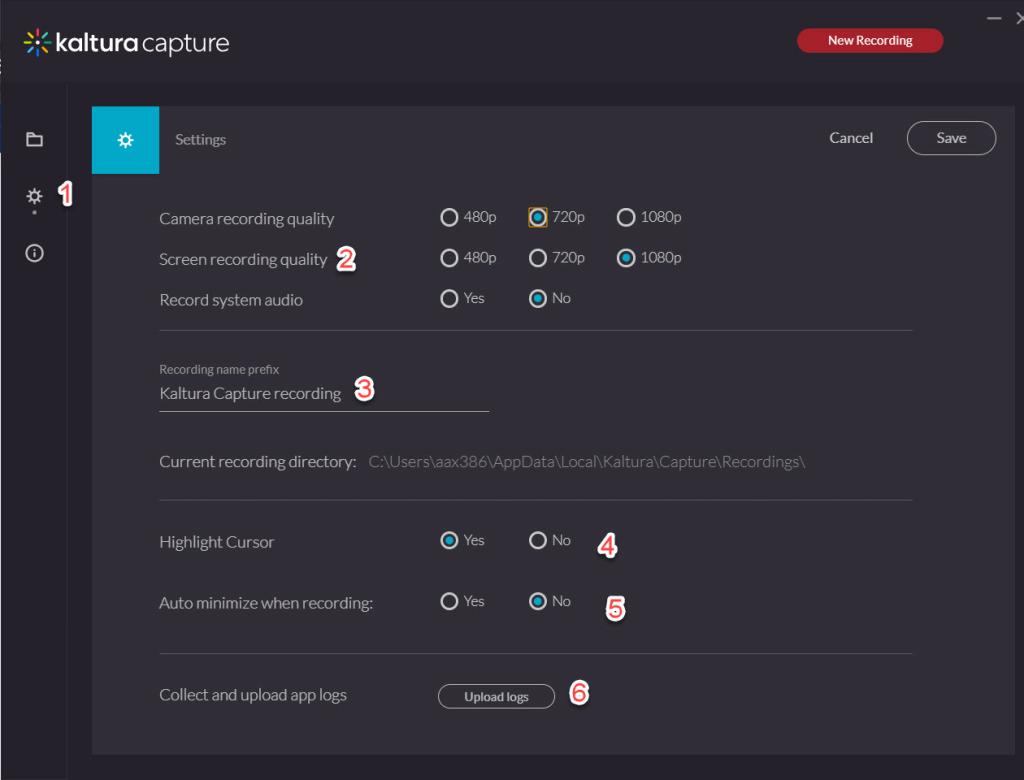
- Click on the cog icon to access the settings
- Camera and screen recording quality – you can adjust the resolution used to record you camera and screen. Selecting lower qualities will reduce the size of the file created by your recording. If you are recording your screen, it is generally best to try to record at a higher resolution otherwise the detail may be difficult to see.
- Recording name – The default prefix given to your recordings. You can always change the title afterwards
- Highlight cursor – If you are recording your screen and have this option turned on, every time you click on the screen, this will be highlighted in yellow. This can make it easier for people to see where you are clicking.
- Auto minimise – if this is turned on, the Kaltura control window will automatically disappear when you are recording. If you are not making use of features such as the annotation tools, this may be useful. Otherwise, you can minimise the window yourself when you are recording.
- Upload logs – you will only need to use this is you have technical problems with Kaltura Capture, it allows support staff to see information about Kaltura Capture on your machine
Making a recording
Once you have selected your video and audio inputs and have adjusted all your settings, click on the red button to start a recording.
You will be given a 3 second countdown before the recording begins.
During the recording, a Kaltura Capture bar will appear in the bottom right of your screen. You can choose for this bar to be minimised when you record by changing your recording settings.
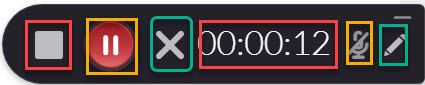
- The square stops the recording, for you to access the options to edit/upload
- The two line within a button pauses the recording
- The X cancels the recording
- The timer indicates the duration of the recording (Hours:Minutes:Seconds)
- The microphone symbol represents audio level
- The pencil offers access to drawing tools – either to annotate on screen or use a whiteboard
There are also a number of keyboard shortcuts which are especially useful if you have chosen to minimise the tool bar while you are recording:
- Command/Ctrl + Shift + R = Record/Pause/Resume Recording
- Command/Ctrl + Shift + S = Stop Recording
- Command/Ctrl + Shift + C = Cancel Recording
Now you can make your recording. If you are recording a PowerPoint presentation, start your presentation in slideshare mode now.
When you have finished click on Done to stop your recording. The manage recordings screen will appear.
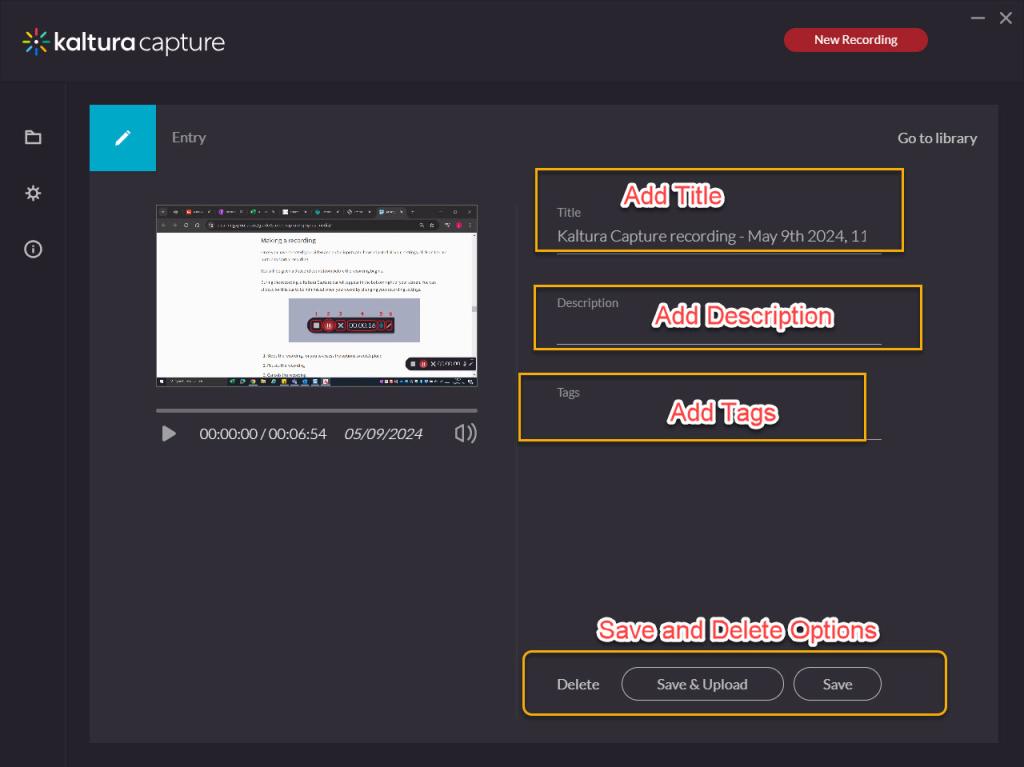
Here you can:
- Preview your recording to check it is as you want it – note you will not see the “packaged” recording on this screen. This is done once you have uploaded your recording to the server. If you have two video sources they will appear one above the other as in this example.
- Add a name, description and tags for your recording
- You can choose just to save the recording or you can choose to save and upload which will start to upload the recording to the server. If you choose just to save, you can return to the manage library screen to upload when you are ready.
- You will need to confirm you own the content and have permission.
Uploading your recording
Once you are happy with your recording, you must upload it to QMplus Media. You do this by selecting the upload button to the side of it. You will need to be connected to the internet in order to upload.
You can monitor the progress of your upload on this screen. How long your recording takes to upload will depend on the speed of your internet connection and the size of your recording file. You will have to remain connected to the internet until your upload has completed.
Once your file has uploaded, the option for upload and the progress status will no longer be visible.
Managing your Kaltura Capture library
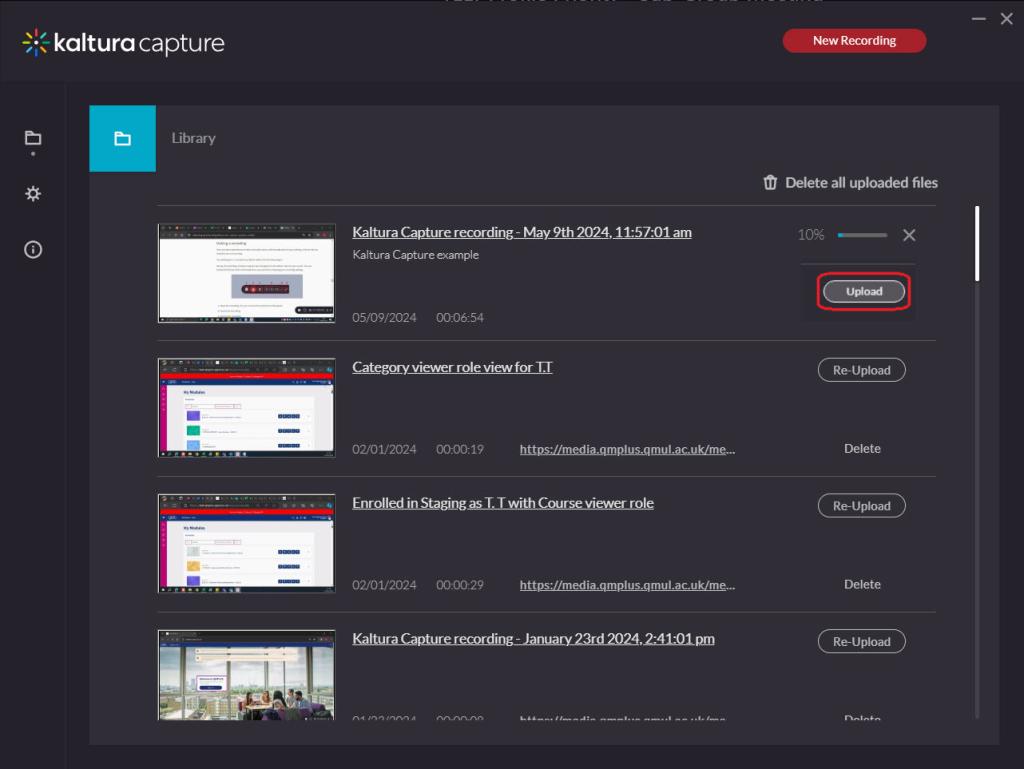
The library tab on the Kaltura Capture application shows you all the recordings that you have stored locally and what their current status is. You access this via the Manage link on the Kaltura Capture toolbar.
.jpg)
On this page you can see which recordings you have and haven’t uploaded. You can upload recordings, or re-upload ones you’ve uploaded before. You can also delete your recordings. Note that deleting a recording here deletes it from your local computer…not from the server. Once you know that your recordings are safely on the server, you can delete the local copies to save space on your computer. The Delete all uploaded recordings allows you to bulk delete all the recordings that you have uploaded rather than having to do them one at a time.
Click on the title of a recording to access the options to edit the title or description.
Viewing and editing your uploaded recording
Once you have uploaded your recording to QMplus Media you can check that it is there and use any of the online tools to edit it.
Log in to QMplus, go to your dashboard and click on the My Media link. You should be able to see your newly uploaded video at the top of the listings. If you have only just uploaded the video you may find that it is still processing. If so, wait for a bit and then check again.
Once you’ve successfully uploaded your recording to QMplus media, there are a number of ways in which you can publish it. Please explore the various guides available.
Tips for recording
To get the best results with Kaltura Capture, we recommend:
- Close down unnecessary applications while recording. Recording can take up a lot of memory so it’s best to have as few applications as possible running when you are recording. Close anything you’re not using.
- Record in high resolution. This will give you a good quality recording. Make sure you’ve got a good amount of free disk space on your computer.
- Keep your recordings short. If you want to record an hour long lecture, divide it up into sections and record the sections individually. Not only is it easier for those viewing your recording but a technical failure 50 minutes into a one hour lecture is more difficult to deal with than a failure 5 minutes into a 10 minute recording!
- Try some practice recordings with different recording settings. Try changing the recording resolutions, find out what your microphone sounds like.
- Make sure you have plenty of space available on your computer for the recording
If you are recording your screen:
- De clutter your screen – make people focus on what’s important and not the contents of the 25 browser tabs you have open
- Make sure there is nothing personal visible either your own data or someone else’s e.g. student details
- Turn off notifications. You do not want alerts from Microsoft Teams popping up halfway through your recording.
- Hide any dates and times visible on your screen