Quick recording with Express Capture
Return to the main QMplus Media site
Quick Recording
There may be times when you want to make a really quick recording of yourself…you might want to sum up what has happened this week, provide a quick bit of feedback on an activity that students have been working on or quickly introduce what’s coming up in the module next week.
There is a tool available on QMplus Media, called Express Capture. It works in your browser, there is no software download required and it allows you to create a recording using a web cam and audio. It’s perfect for a really quick video. You can embed the recording into a QMplus area, on a website or send it to someone as a link.
Note: Express Capture only captures a camera and audio. If you want to record your screen too, try using Kaltura Capture.
Make a recording via My Media
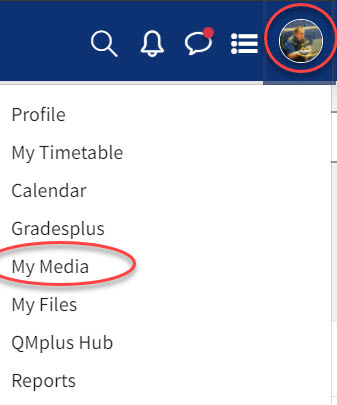
Within QMplus click on your profile icon and select My Media in the drop down menu.
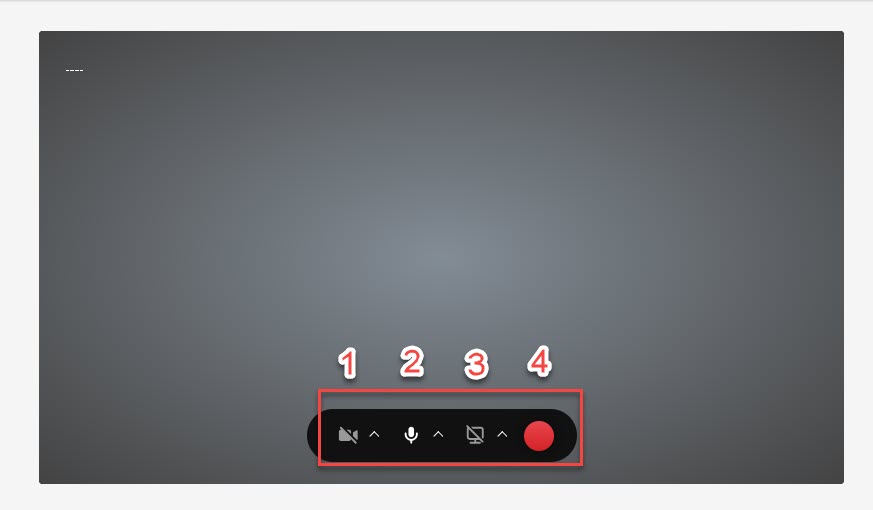
1-Click on the camera icon at the bottom of the screen to select the camera
2- Click on the microphone symbol to choose microphone you want to use. Make sure you choose the right ones if you have multiple devices attached to your computer.
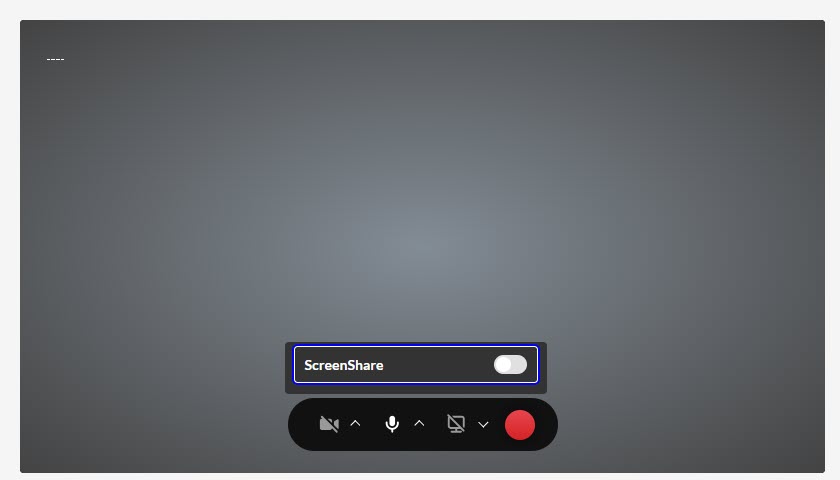
3- Click on the screen share icon if you wish to share a screen. You will be prompted to turn a toggle on.
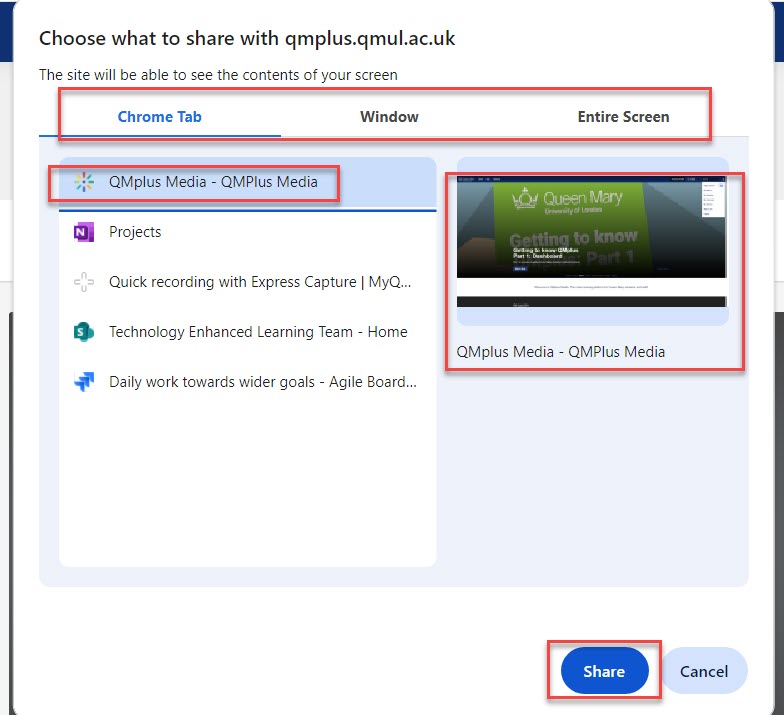
3.A You will then be presented with a set of options to choose.
3. B Select which tab, window or screen you wish to share. You may be able to see how it will appear in the in the preview screen.
3.C Select share when you are satisfied with the selection.
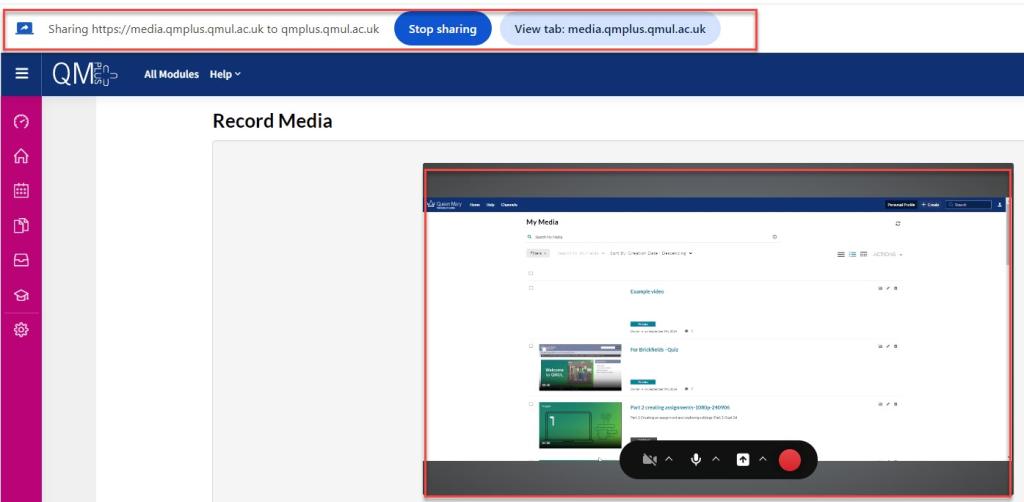
3.C You will see a message at the top of the browser confirming the screen you are sharing and offering the chance to stop. 3.D You can see a preview of the screenshare in the Express Capture window.
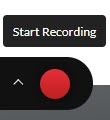
4. When you are ready, press the big red record button.
4. A Make your recording.
4.B Press stop.

You can review your recording to see if you are happy with it. Then you can:
- Select Record again if you’re not happy with this version
- Download a copy of the recording, in webm format
- Select Use this to keep this recording
When you select Use this your recording will be uploaded from your computer to QMplus Media. The bar at the top of the page will show when the upload is complete.
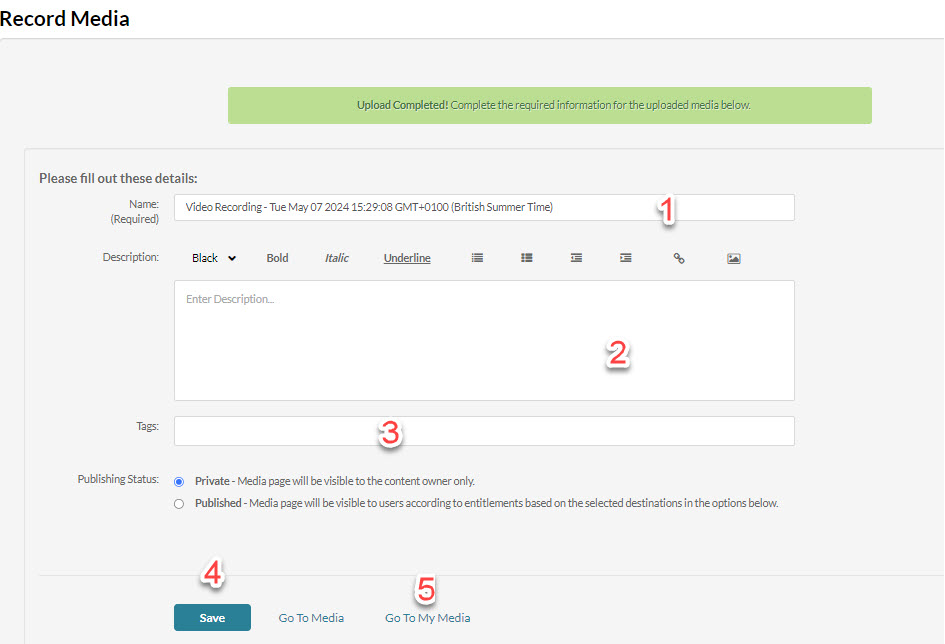
- Name
- Description
- Tags – e.g. you might tag videos with a module code to make them easier to find
- Select Save to save the details you have just entered
- Select Go to Media to go to the Media page, this is where you can do things like edit the recording or add captions, or My Media to return to your My Media area
You can now embed this recording into QMplus in the same way as any other QMplus Media video.
Make a recording via the text editor in QMplus
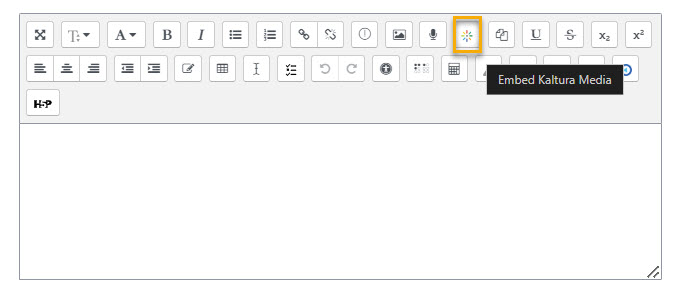
Select the Embed Kaltura Media icon in the editor. It looks like a multi-coloured flower, or a firework.
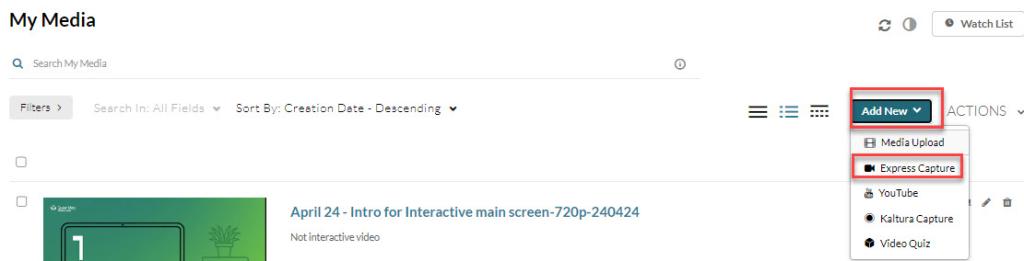
Select the Add New item and then select Express Capture.
1-Click on the camera icon at the bottom of the screen to select the camera
2- Click on the microphone symbol to choose microphone you want to use. Make sure you choose the right ones if you have multiple devices attached to your computer.
3- Click on the screen share icon if you wish to share a screen. You will be prompted to turn a toggle on.
3.A You will then be presented with a set of options to choose.
3. B Select which tab, window or screen you wish to share. You may be able to see how it will appear in the in the preview screen.
3.C Select share when you are satisfied with the selection.
3.C You will see a message at the top of the browser confirming the screen you are sharing and offering the chance to stop. 3.D You can see a preview of the screenshare in the Express Capture window.
4. When you are ready, press the big red record button.
4. A Make your recording.
4.B Press stop.

You can watch your recording and then:
1-Select Record again if you’re not happy and want to try again
2-Download a copy of the recording in webm format
3- Select Use this if you’re happy with the recording
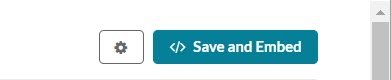
If you select Use this your recording will upload to QMplus Media.
Locate the video in your My Media Libary and click on the share tab. Then copy the embed code.
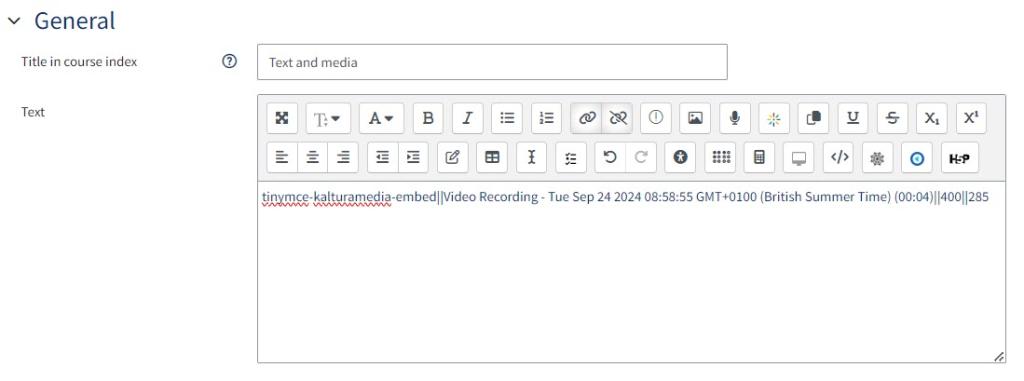
Return to the Text and media, click on the HTML icon and then paste the embed code. Reclick the HTML Icon.
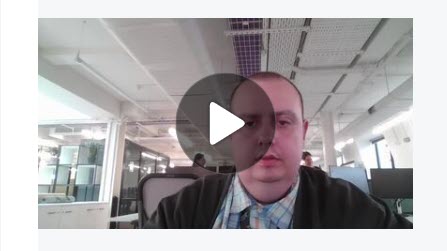
Embeded Express Capture can be seen above.