Find out how to create a Turnitin assignment in QMplus
Creating an assignment
The process of creating an assignment with Turnitin enabled is exactly the same as creating a standard QMplus assignment.
Within the course module area, ‘Turn editing on’ in the top right corner of the screen.

Within the course page, click “Add an activity or resource” in the topic where you wish to add the assignment.

Choose ‘Assignment’ from the list of activities and resources which appear on the right of the screen. Click ‘Add’ and this will open the ‘Editing Assignment’ screen.

There are a number of sections on this screen which you can leave as the default or change to suit your requirements. In this guide we are going to focus on two sections:
- Availability
- Turnitin Plagiarism Plugin Settings
Setting the assignment availability
In the Availability section, you will need to set the following options:
- Allow submission from date – when should students be able to start submitting assignments. If you do not enable this setting, then students can start submitting immediately.
- Due date – when students need to submit by.
- Cut off date – students will not be able to submit anything at all after this date. You may wish to consider setting the cut off date to some time after the due date. This means students will still be able to submit but will appear in the grading table as having submitted late, in red. If you set the due date and the cut off date to the same date, you will have to have some provision for late submissions.
- Remind me to grade by date – teachers will receive a notification to remind them of the date for marking to be completed.

Configuring Turnitin
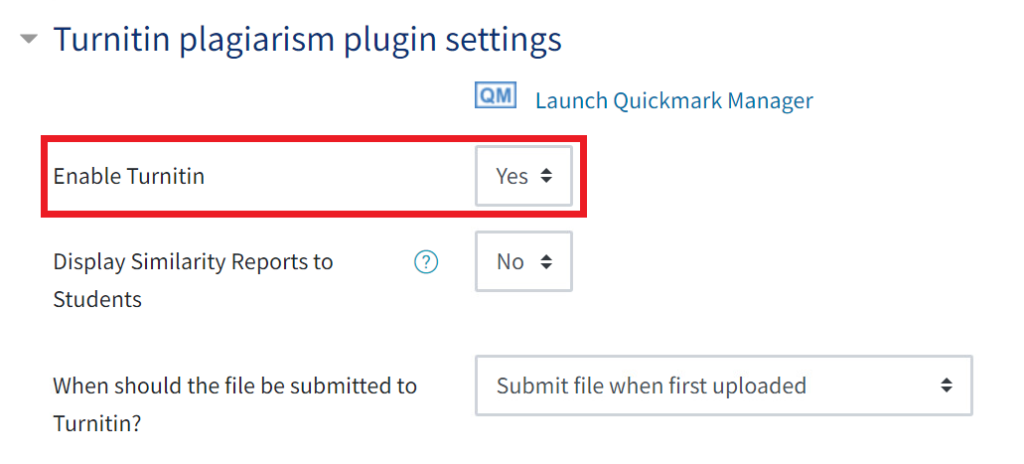
To enable Turnitin, scroll down to the Turnitin Plagiarism Plugin Settings section and then simply select Yes under the Enable Turnitin setting.

Three settings of particular importance under the Turnitin Settings:
- Allow submission of any file type? – By default, Turnitin will only accept files which it can check for similarity with other work. It is possible, however, to configure Turnitin to accept any file type. It will attempt to run a similarity check on any file which is uploaded.
- Display originality report to students? – allows you to decide whether you want your students to see their Turnitin similarity score and originality report or not. We recommend that if you do allow your students to view their originality report that they are provided with guidance in how to interpret it.
- Report generation speed – this setting controls when the Turnitin check is conducted on student work. It also controls whether students are able to re-submit their work or not.
- Generate reports immediately (students cannot resubmit) – student work is sent to Turnitin as soon as it is submitted. The reports are usually available relatively quickly after submission, often within as little as 10 minutes. With this option, re-submission of work is not possible.
- Generate reports immediately (students can resubmit until due date): After 3 re-submissions, reports generate after 24 hours– student work is sent to Turnitin as soon as it is submitted. Students can then re-submit work up until the due date. This setting is of most use if you are allowing your students to see their similarity scores and originality reports. They can submit a draft of their work, view the the originality score and then re-write their work if necessary.
Please note: Although the first report will be generated relatively quickly, subsequent reports will be subject to a 24 hour delay. This is to discourage students from using Turnitin to “tweak” their work. If you would like your students to resubmit ensure that the setting for assignment ‘Submission Setting’ requires student to click a submit button is set to ‘No’ and ‘Number of attempts’ is set to ‘Unlimited’.
- Generate reports on due date (students can resubmit until due date) – student work is not sent to Turnitin for processing until the due date. Students can re-submit their work up until the due date. Late submissions are sent for processing at the time they are submitted. If you are not going to look at student work until after the due date, it is worth considering using this option as this will allow students the chance to resubmit if they realise they have made a mistake.
Once you have made your selections here, you should scroll to the bottom of the page and click the “Save and Return to Course” or “Save and Display” button.
When do grades get released to students?
You control the release of grades and feedback to students in the same way as for a standard QMplus assignment. Namely:
- Manually hiding and unhiding the appropriate column in the grade book
- Setting the grade book column to automatically become visible on a particular date
- Using the grading workflow feature on the assignment