Setting up Groups and Groupings
About Groups and Groupings
Groups and groupings are a powerful way to manage what different users can do and see in your QMplus course.
A grouping is a collection of groups within a course. Using groupings allows you to direct tasks at one or more groups in your course, so that they can work together on the tasks.
Examples of groups include:
- You are a teacher in a course where you have several classes and you want to filter your activities and gradebook so you only see one class at a time.
- You are a teacher sharing a course with other teachers and you want to filter your activities and gradebook so you don't see the students from your colleagues’ classes.
- You want to allocate a particular activity, resource or topic section to just one class or set of users and you don't want others to see it.
Examples of groupings include:
- You teach students in a course called 'The Art of Language'.
- Your students are divided into four groups, Listening, Reading, Speaking and Writing, and for much of the course they work in these groups.
- You wish the students to work on a project, exploring passive and active language. You create a grouping Passive Language and assign the Listening and Reading groups to this grouping. You create a grouping Active Language and assign the Speaking and Writing groups to this grouping.
- Using the Restrict access feature you set certain tasks only for the Passive Language grouping and other tasks only for the Active Language grouping.
- Now the groups can work together, within their grouping, on their respective focus areas.
- At the end of the project you can bring the groups together in an activity for all participants to share their learning.
Creating a group
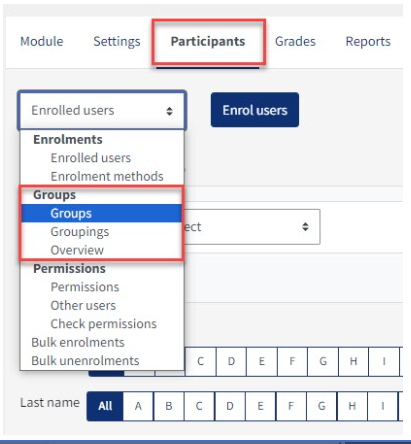
- Under the Participants section from the Course navigation and from the dropdown select Groups.
- Click the Create group button:
- Add a group name and optional description (displayed above the list of group members on the participants page), enrolment key and picture (displayed on the participants page and next to forum posts)
- Tick the box Enable group messaging if you wish to enage in group conversations. You will then be able to send group messages from the messaging drawer.
- Make sure you are in the group as well as your students. See Messaging for more information.
- Click the 'Save changes' button
- Select the group to which you want to add participants, then click the 'Add/remove users button
- In the "Potential members" list, select the users you want to add to the group. Multiple users may be selected using the Crtl key.
- Click the Add button to add the users to the group
An optional group ID number (an advanced setting) may be added for matching the group against external systems. Group ID numbers are not displayed anywhere on the site. Within a course, all group ID numbers must be unique. Thus it's not possible to create a group with a duplicate group ID number.
More information: Groups (Moodle docs)
Adding groups to a grouping
- Under the Participants section, within the Enrolled Users dropdown, select Groupings.
- If necessary, create a new grouping by clicking the create grouping button on the groupings page. An optional grouping ID number (an advanced setting) may be added for matching the grouping against external systems. Grouping ID numbers are not displayed anywhere on the site. Within a course, all grouping ID numbers must be unique.
- Click the "Show groups in grouping" people icon in the edit column.
- On the add/remove groups page, select the group(s) you want to add to the grouping from the "Potential members" list.
- Click the arrow button that points towards the "Existing members" list.
- Click the "Back to groupings" button. The group(s) you added to the grouping will now be listed in the table on the groupings page.
More information about groupings (Moodle docs)
Bulk create groups
The 'Import Groups' feature provides a simple, easy way to create groups from a spreadsheet (CSV).
This Moodle document explains how to do this - Import groups (Moodle doc)
Automatically add users to a group at the same time as enrolling them
One of the optional field names that can be uploaded in the flat file is "group1, group2, etc". The group must be associated to the corresponding course and the course short name used in the field course1. If the group doesn't already exist then it will be created.
See also Bulk enrolments (Moodle doc)
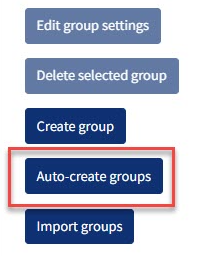
Auto-create groups
Groups may also be created automatically.
More information is available on Auto-Create Groups (Moodle Docs).
Allow students to choose their group
Group choice is a plugin that has been installed in QMplus. It is an activity that can be added to the course via the activity and resource picker.
The group choice activity allows students to enrol themselves in a group within a course. The teacher can choose the groups offered and the maximum number of students allowed in each group.
The students can view the members of each group before making a selection, and (if the teacher allows it) change their selected group until the deadline. More than one group may be chosen if necessary. There is the possibility to decide in which order the groups are listed ("Sort groups by"): Name or Group creation date.
More information: Group choice activity (Moodle docs)